# Integrate with Container Storage Interface (CSI)
### Điều kiện cần
Để có thể khởi tạo một **Cluster** và **Deploy** một **Workload**, bạn cần:
* Có ít nhất 1 **VPC** và 1 **Subnet** đang ở trạng thái **ACTIVE**. Nếu bạn chưa có VPC, Subnet nào, vui lòng khởi tạo VPC, Subnet theo hướng dẫn tại [đây.](https://docs.vngcloud.vn/vng-cloud-document/vn/vserver/compute-hcm03-1a/network/virtual-private-cloud-vpc)
* Có ít nhất 1 **SSH** key đang ở trạng thái **ACTIVE**. Nếu bạn chưa có SSH key nào, vui lòng khởi tạo SSH key theo hướng dẫn tại [đây.](https://docs.vngcloud.vn/vng-cloud-document/vn/vserver/compute-hcm03-1a/network/virtual-private-cloud-vpc)
* Đã cài đặt và cấu hình **kubectl** trên thiết bị của bạn. vui lòng tham khảo tại [đây](https://kubernetes.io/vi/docs/tasks/tools/install-kubectl/) nếu bạn chưa rõ cách cài đặt và sử dụng kuberctl. Ngoài ra, bạn không nên sử dụng phiên bản kubectl quá cũ, chúng tôi khuyến cáo bạn nên sử dụng phiên bản kubectl sai lệch không quá một phiên bản với version của cluster.
***
### Khởi tạo Cluster
**Cluster trong Kubernetes** là một tập hợp gồm một hoặc nhiều máy ảo (VM) được kết nối lại với nhau để chạy các ứng dụng được đóng gói dạng container. Cluster cung cấp một môi trường thống nhất để triển khai, quản lý và vận hành các container trên quy mô lớn.
Để khởi tạo một Cluster, hãy làm theo các bước bên dưới:
**Bước 1:** Truy cập vào [https://vks.console.vngcloud.vn/overview](https://vks.console-dev.vngcloud.tech/overview)
**Bước 2:** Tại màn hình **Overview**, chọn **Activate.**
**Bước 3:** Chờ đợi tới khi chúng tôi khởi tạo thành công tài khoản VKS của bạn. Sau khi Activate thành công, bạn hãy chọn **Create a Cluster**
**Bước 4:** Tại màn hình khởi tạo Cluster, chúng tôi đã thiết lập thông tin cho Cluster và một **Default Node Group** cho bạn, bạn có thể giữ các giá trị mặc định này hoặc điều chỉnh các thông số mong muốn cho Cluster và Node Group của bạn tại Cluster Configuration, Default Node Group Configuration, Plugin. Khi bạn chọn bật option **Enable vLB Native Integration Driver**, mặc định chúng tôi sẽ cài sẵn plugin này vào Cluster của bạn.
**Bước 5:** Chọn **Create Kubernetes cluster.** Hãy chờ vài phút để chúng tôi khởi tạo Cluster của bạn, trạng thái của Cluster lúc này là **Creating**.
**Bước 6:** Khi trạng thái **Cluster** là **Active**, bạn có thể xem thông tin Cluster, thông tin Node Group bằng cách chọn vào Cluster Name tại cột **Name**.
***
### Kết nối và kiểm tra thông tin Cluster vừa tạo
Sau khi Cluster được khởi tạo thành công, bạn có thể thực hiện kết nối và kiểm tra thông tin Cluster vừa tạo theo các bước:
**Bước 1:** Truy cập vào [https://vks.console.vngcloud.vn/k8s-cluster](https://vks.console-dev.vngcloud.tech/overview)
**Bước 2:** Danh sách Cluster được hiển thị, chọn **Download Config File** để thực hiện tải xuống file kubeconfig. File này sẽ giúp bạn có toàn quyền truy cập vào Cluster của bạn.
**Bước 3**: Đổi tên file này thành config và lưu nó vào thư mục **\~/.kube/config**
**Bước 4:** Thực hiện kiểm tra Cluster thông qua lệnh:
* Chạy câu lệnh sau đây để kiểm tra **node**
```bash
kubectl get nodes
```
* Nếu kết quả trả về như bên dưới tức là bạn Cluster của bạn được khởi tạo thành công với 3 node như bên dưới.
```bash
NAME STATUS ROLES AGE VERSION
ng-0e10592c-e70e-404d-a4e8-5e3b80f805e4-834b7 Ready 50m v1.28.8
ng-0e10592c-e70e-404d-a4e8-5e3b80f805e4-cf652 Ready 23m v1.28.8
ng-0f4ed631-1252-49f7-8dfc-386fa0b2d29b-a8ef0 Ready 28m v1.28.8
```
***
### Khởi tạo Service Account và cài đặt GreenNode BlockStorage CSI Driver
{% hint style="info" %}
**Chú ý:**
* Khi bạn thực hiện khởi tạo Cluster theo hướng dẫn bên trên, nếu bạn chưa bật option **Enable BlockStore Persistent Disk CSI Driver**, mặc định chúng tôi sẽ không cài sẵn plugin này vào Cluster của bạn. Bạn cần tự thực hiện Khởi tạo Service Account và cài đặt GreenNode BlockStorage CSI Driver theo hướng dẫn bên dưới. Nếu bạn đã bật option **Enable BlockStore Persistent Disk CSI Driver**, thì chúng tôi đã cài sẵn plugin này vào Cluster của bạn, hãy bỏ qua bước Khởi tạo Service Account, cài đặt GreenNode BlockStorage CSI Driver và tiếp tục thực hiện theo hướng dẫn kể từ Deploy một Workload.
* **GreenNode BlockStorage CSI Driver** chỉ hỗ trợ attach volume với một node (VM) duy nhất trong suốt vòng đời của volume đó. Nếu bạn có nhu cầu ReadWriteMany, bạn có thể cân nhắc sử dụng NFS CSI Driver, vì nó cho phép nhiều nodes có thể Read và Write trên cùng một volume cùng một lúc. Điều này rất hữu ích cho các ứng dụng cần chia sẻ dữ liệu giữa nhiều pods hoặc services trong Kubernetes.
{% endhint %}
Khởi tạo Service Account và cài đặt GreenNode BlockStorage CSI Driver
**Khởi tạo Service Account**
* Khởi tạo hoặc sử dụng một **service account** đã tạo trên IAM và gắn policy: **vServerFullAccess**. Để tạo service account bạn truy cập tại [đây](https://iam.console.vngcloud.vn/service-accounts) và thực hiện theo các bước sau:
* Chọn "**Create a Service Account**", điền tên cho Service Account và nhấn **Next Step** để gắn quyền cho Service Account
* Tìm và chọn **Policy:** **vServerFullAccess**, sau đó nhấn "**Create a Service Account**" để tạo Service Account, Policy: vLBFullAccess vàPolicy: vServerFullAccess do GreenNode tạo ra, bạn không thể xóa các policy này.
* Sau khi tạo thành công bạn cần phải lưu lại **Client\_ID** và **Secret\_Key** của Service Account để thực hiện bước tiếp theo.
**Cài đặt GreenNode BlockStorage CSI Driver**
* Cài đặt Helm phiên bản từ 3.0 trở lên. Tham khảo tại để biết cách cài đặt.
* Thêm repo này vào cluster của bạn qua lệnh:
```bash
helm repo add vks-helm-charts https://vngcloud.github.io/vks-helm-charts
helm repo update
```
* Thay thế thông tin ClientID, Client Secret và ClusterID của cụm K8S của bạn và tiếp tục chạy:
```bash
helm install vngcloud-blockstorage-csi-driver vks-helm-charts/vngcloud-blockstorage-csi-driver \
--replace --namespace kube-system \
--set vngcloudAccessSecret.keyId=${VNGCLOUD_CLIENT_ID} \
--set vngcloudAccessSecret.accessKey=${VNGCLOUD_CLIENT_SECRET} \
--set vngcloudAccessSecret.vksClusterId=${VNGCLOUD_VKS_CLUSTER_ID} # Optional
```
* Sau khi việc cài đặt hoàn tất, thực hiện kiểm tra trạng thái của vngcloud-blockstorage-csi-driver pods:
```bash
kubectl get pods -n kube-system | grep vngcloud-csi-controller
```
Ví dụ như ảnh bên dưới là bạn đã cài đặt thành công vngcloud-controller-manager:
```bash
NAME READY STATUS RESTARTS AGE
vngcloud-csi-controller-56bd7b85f-ctpns 7/7 Running 6 (2d4h ago) 2d4h
vngcloud-csi-controller-56bd7b85f-npp9n 7/7 Running 2 (2d4h ago) 2d4h
vngcloud-csi-node-c8r2w 3/3 Running 0 2d4h
```
***
### **Tạo Storage Class**
Storage Class (hay còn được gọi tắt là SC) là **một mẫu** để tạo ổ đĩa (PersistentVolume) tự động theo nhu cầu. Trên GreenNode, SC định nghĩa loại ổ đĩa, tốc độ, ... (ví dụ: SSD, HDD, IOPS 50000,...).
* Tạo file **storage-class.yaml** với nội dung sau:
```bash
apiVersion: storage.k8s.io/v1
kind: StorageClass
metadata:
name: my-expansion-storage-class # [1] The StorageClass name, CAN be changed
provisioner: bs.csi.vngcloud.vn # The VNG-CLOUD CSI driver name
parameters:
type: vtype-61c3fc5b-f4e9-45b4-8957-8aa7b6029018 # The volume type UUID
allowVolumeExpansion: true # MUST set this value to turn on volume expansion feature
```
* Chạy câu lệnh sau đây để triển khai tạo storage class:
```
kubectl apply -f storage-class.yaml
```
***
### **Tạo Persistent Volume Claim**
PersistentVolumeClaim (hay còn gọi là PVC) là **yêu cầu người dùng gửi ra** để xin một ổ đĩa lưu trữ có kích thước cụ thể. Khi bạn tạo một PVC, Kubernetes sẽ dùng SC để tạo hoặc chọn một ổ đĩa phù hợp.
* Tạo file **persistent-volume-claim.yaml** với nội dung sau:
```
apiVersion: v1
kind: PersistentVolumeClaim
metadata:
name: my-expansion-pvc # [2] The PVC name, CAN be changed
spec:
accessModes:
- ReadWriteOnce
resources:
requests:
storage: 20Gi # [3] The PVC size, CAN be changed, this value MUST be in the valid range of the proper volume type
storageClassName: my-expansion-storage-class # [4] The StorageClass name, MUST be the same as [1]
```
* Chạy câu lệnh sau đây để triển khai tạo pvc:
```
kubectl apply -f persistent-volume-claim.yaml
```
***
### Tạo pod dùng PVC
* Tạo file **podnginx-pvc.yaml** với nội dung sau:
```
apiVersion: v1
kind: Pod
metadata:
name: nginx # [5] The Pod name, CAN be changed
spec:
containers:
- image: nginx
imagePullPolicy: IfNotPresent
name: nginx
ports:
- containerPort: 80
protocol: TCP
volumeMounts:
- mountPath: /var/lib/www/html
name: my-volume-name # MUST be the same as [6]
volumes:
- name: my-volume-name # [6] The volume name, CAN be changed
persistentVolumeClaim:
claimName: my-expansion-pvc # MUST be the same as [2]
readOnly: false
```
* Chạy câu lệnh sau đây để triển khai tạo pod:
```
kubectl apply -f podnginx-pvc.yaml
```
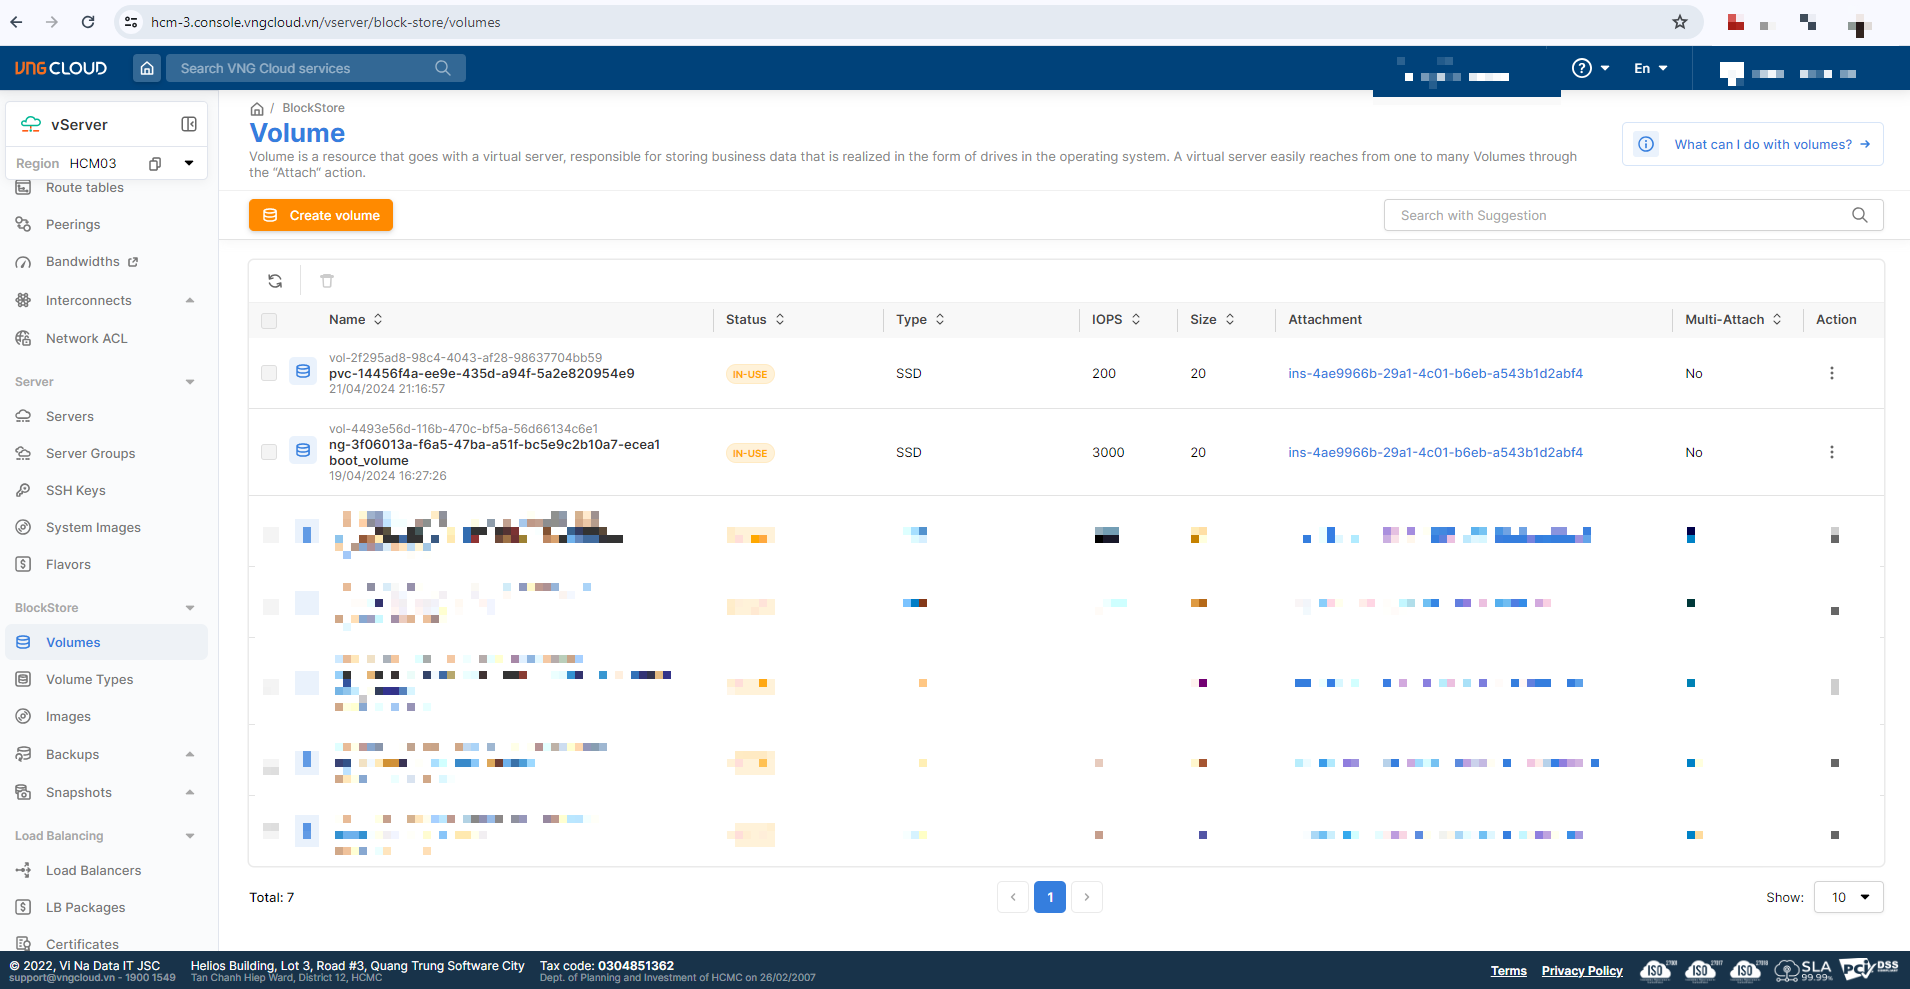
Lúc này, hệ thống vServer sẽ tự động tạo một Volume tương ứng với file yaml bên trên, volume này sẽ được attach vào node chứa pod dùng PVC đang chạy, ví dụ:
***
### **Tạo Snapshot**
Snapshot là phương pháp sao lưu giữ liệu với chi phí thấp, thuận tiện và hiệu quả và có thể được sử dụng để tạo image, phục hồi dữ liệu và phân phối các bản sao dữ liệu. Nếu bạn là người dùng mới chưa từng sử dụng dịch vụ Snapshot, bạn cần thực hiện Activate Snapshot Service (Kích hoạt dịch vụ Snapshot) trước khi có thể tạo Snapshot cho Persistent Volume của bạn.
#### **Activate Snapshot Service**
Để có thể tạo Snapshot, bạn cần thực hiện Activate Snapshot Service. Bạn sẽ không bị tính phí khi kích hoạt dịch vụ snapshot. Sau khi bạn tạo snapshot, chi phí sẽ được tính dựa trên dung lượng lưu trữ và thời gian lưu trữ của các bản snapshot này. Thực hiện theo các bước sau đây để kích hoạt dịch vụ Snapshot:
**Bước 1:** Truy cập vào
**Bước 2:** Chọn **Activate Snapshot Service**.
Ví dụ:
#### **Cài đặt GreenNode Snapshot Controller**
* Cài đặt Helm phiên bản từ 3.0 trở lên. Tham khảo tại để biết cách cài đặt.
* Thêm repo này vào cluster của bạn qua lệnh:
```
helm repo add vks-helm-charts https://vngcloud.github.io/vks-helm-charts
helm repo update
```
* Tiếp tục chạy:
```
helm install vngcloud-snapshot-controller vks-helm-charts/vngcloud-snapshot-controller \
--replace --namespace kube-system
```
* Sau khi việc cài đặt hoàn tất, thực hiện kiểm tra trạng thái của vngcloud-blockstorage-csi-driver pods:
```
kubectl get pods -n kube-system
```
Ví dụ như ảnh bên dưới là bạn đã cài đặt thành công vngcloud-controller-manager:
```
NAME READY STATUS RESTARTS AGE
snapshot-controller-7fdd984f89-745tg 0/1 ContainerCreating 0 3s
snapshot-controller-7fdd984f89-k94wq 0/1 ContainerCreating 0 3s
```
#### Tạo file **snapshot.yaml** với nội dung sau:
```
apiVersion: snapshot.storage.k8s.io/v1
kind: VolumeSnapshotClass
metadata:
name: my-snapshot-storage-class # [2] The name of the volume snapshot class, CAN be changed
driver: bs.csi.vngcloud.vn
deletionPolicy: Delete
parameters:
force-create: "false"
---
apiVersion: snapshot.storage.k8s.io/v1
kind: VolumeSnapshot
metadata:
name: my-snapshot-pvc # [4] The name of the snapshot, CAN be changed
spec:
volumeSnapshotClassName: my-snapshot-storage-class # MUST match with [2]
source:
persistentVolumeClaimName: my-expansion-pvc # MUST match with [3]
```
* Chạy câu lệnh sau đây để triển khai Ingress
```
kubectl apply -f snapshot.yaml
```
***
### **Kiểm tra PVC và Snapshot vừa tạo**
* Sau khi apply tập tin thành công, bạn có thể kiểm tra danh sách service, pvc thông qua:
```
kubectl get sc,pvc,pod -owide
```
```
NAME PROVISIONER RECLAIMPOLICY VOLUMEBINDINGMODE ALLOWVOLUMEEXPANSION AGE
storageclass.storage.k8s.io/my-expansion-storage-class bs.csi.vngcloud.vn Delete Immediate true 10m
storageclass.storage.k8s.io/sc-iops-200-retain (default) bs.csi.vngcloud.vn Retain Immediate false 2d4h
NAME STATUS VOLUME CAPACITY ACCESS MODES STORAGECLASS AGE VOLUMEMODE
persistentvolumeclaim/my-expansion-pvc Bound pvc-14456f4a-ee9e-435d-a94f-5a2e820954e9 20Gi RWO my-expansion-storage-class 10m Filesystem
NAME READY STATUS RESTARTS AGE IP NODE NOMINATED NODE READINESS GATES
pod/nginx 1/1 Running 0 10m 172.16.24.203 ng-3f06013a-f6a5-47ba-a51f-bc5e9c2b10a7-ecea1
pod/nginx-app-7f45b65946-t7d7k 1/1 Running 0 94m 172.16.24.202 ng-3f06013a-f6a5-47ba-a51f-bc5e9c2b10a7-ecea1
```
***
### Thay đổi thông số IOPS của Persistent Volume vừa tạo
\
Để thay đổi thông số IOPS của Persistent Volume vừa tạo, hãy thực hiện theo các bước sau đây:
**Bước 1:** Chạy lệnh bên dưới để liệt kê các PVC trong Cluster của bạn
```
kubectl get persistentvolumes
```
**Bước 2:** Chỉnh sửa tệp tin YAML của PVC theo lệnh
```
kubectl edit pvc my-expansion-pvc
```
* Nếu bạn chưa chỉnh sửa IOPS của Persistent Volume lần nào trước đó, khi bạn chạy lệnh trên, bạn hãy thêm 1 annotation bs.csi.vngcloud.vn/volume-type: "volume-type-id" . Ví dụ: bên dưới tôi đang thay đổi IOPS của Persistent Volume từ 200 (Volume type id = vtype-61c3fc5b-f4e9-45b4-8957-8aa7b6029018) lên 1000 (Volume type id = vtype-85b39362-a360-4bbb-9afa-a36a40cea748)
```
apiVersion: v1
kind: PersistentVolumeClaim
metadata:
annotations:
bs.csi.vngcloud.vn/volume-type: "vtype-85b39362-a360-4bbb-9afa-a36a40cea748"
kubectl.kubernetes.io/last-applied-configuration: |
{"apiVersion":"v1","kind":"PersistentVolumeClaim","metadata":{"annotations":{},"name":"my-expansion-pvc","namespace":"default"},"spec":{"accessModes":["ReadWriteOnce"],"resources":{"requests":{"storage":"20Gi"}},"storageClassName":"my-expansion-storage-class"}}
pv.kubernetes.io/bind-completed: "yes"
pv.kubernetes.io/bound-by-controller: "yes"
volume.beta.kubernetes.io/storage-provisioner: bs.csi.vngcloud.vn
volume.kubernetes.io/storage-provisioner: bs.csi.vngcloud.vn
creationTimestamp: "2024-04-21T14:16:53Z"
finalizers:
- kubernetes.io/pvc-protection
name: my-expansion-pvc
namespace: default
resourceVersion: "11041591"
uid: 14456f4a-ee9e-435d-a94f-5a2e820954e9
spec:
accessModes:
- ReadWriteOnce
resources:
requests:
storage: 20Gi
storageClassName: my-expansion-storage-class
volumeMode: Filesystem
volumeName: pvc-14456f4a-ee9e-435d-a94f-5a2e820954e9
status:
accessModes:
- ReadWriteOnce
capacity:
storage: 20Gi
phase: Bound
```
* Nếu bạn đã chỉnh sửa IOPS của Persistent Volume lần nào trước đó, khi bạn chạy lệnh trên, tệp tin yaml của bạn đã có sẵn annotation bs.csi.vngcloud.vn/volume-type: "volume-type-id" . Lúc này, hãy chỉnh sửa annotation này về Volume type id có IOPS mà bạn mong muốn.
### Thay đổi Disk Volume của Persistent Volume vừa tạo
\
Để thay đổi Disk Volume của Persistent Volume vừa tạo, hãy thực hiện chạy lệnh sau:
Ví dụ: ban đầu PVC được tạo có kích cỡ 20 Gi, hiện tại tôi sẽ tăng nó lên 30Gi
```
kubectl patch pvc my-expansion-pvc -p '{"spec":{"resources":{"requests":{"storage":"30Gi"}}}}'
```
{% hint style="info" %}
Chú ý:
* Bạn chỉ có thể thực hiện tăng Disk Volume mà không thể thực hiện giảm kích thước Disk Volume này.
{% endhint %}
### Restore Persistent Volume từ Snapshot
Để khôi phục Persistent Volume từ Snapshot, bạn hãy thực hiện theo các bước sau:
* Tạo file **restore-volume.yaml** với nội dung sau:
```
apiVersion: v1
kind: PersistentVolumeClaim
metadata:
name: my-restore-pvc # The name of the PVC, CAN be changed
spec:
storageClassName: my-expansion-storage-class
dataSource:
name: my-snapshot-pvc # MUST match with [4] from the section 5.2
kind: VolumeSnapshot
apiGroup: snapshot.storage.k8s.io
accessModes:
- ReadWriteOnce
resources:
requests:
storage: 20Gi
```